
Home inspection • explainer
Thermal Camera vs. Moisture Meter: Use the Right Tool for the Clue
A thermal camera helps you find suspicious patterns; a moisture meter tests the material. Learn when to use each and why they work best together.
A thermal camera is the faster tool for finding unusual surface-temperature patterns across a wall, ceiling, or floor. A moisture meter is the better tool for checking whether the material at a specific spot is damp. For a suspected hidden leak, the most reliable workflow is usually scan first, confirm second.
Neither device identifies the source by itself. A cold patch is not automatically water, and an elevated moisture reading does not tell you which pipe, roof detail, or appliance caused it.
The difference in one table
| Tool | Best question | Main strength | Main limitation |
|---|---|---|---|
| Thermal camera | “Where should I investigate?” | Scans a broad area quickly and shows patterns | Measures surface temperature, not moisture |
| Pinless moisture meter | “Is this area different from comparable dry material?” | Non-destructive comparative scanning | Usually gives a relative reading; metal can interfere |
| Pin moisture meter | “What is the reading at this exact point?” | Direct probe contact and material-specific measurement on suitable meters | Leaves small holes and samples only between/around the pins |
What a thermal camera actually measures
A thermal camera measures infrared energy arriving from a visible surface and converts it into a temperature image. Moisture can affect surface temperature through evaporation, conduction, or added thermal mass, which is why damp areas sometimes form recognizable patterns.
The camera does not see water and cannot see through drywall. It also cannot distinguish moisture from every other cause of a temperature difference. Moving air, missing insulation, thermal bridges, recent sunlight, and hot or cold pipework can all produce convincing anomalies.
Thermal imaging is therefore a search tool. It can narrow a large ceiling to a smaller area worth testing, show the apparent path of an active pattern, and help document how that pattern changes. Its usefulness depends on adequate contrast and careful interpretation.
What a moisture meter measures
Moisture meters infer moisture from how a material responds electrically. A pin meter passes a signal between two probes. A pinless meter uses a sensor against the surface to scan below it without puncturing the finish.
A pin meter is useful when the material and meter scale support a meaningful reading and small probe marks are acceptable. Pinless models are convenient for sweeping a larger finished surface and comparing suspicious and apparently dry areas. Many pinless readings are relative, not a universal percentage of moisture. Compare similar material at similar depth rather than assuming one number means the same thing in drywall, timber, and masonry.
Hidden metal, fasteners, wiring, salts, material density, and depth can affect readings. A moisture meter confirms that the test area behaves differently; it does not automatically identify the cause or extent of damage.
Which should you buy first?
Choose a moisture meter first when you already know the suspect location—for example, below a leaking window, beside a shower, or under a visible stain. It is the more direct answer to “is this material damp?”
Choose a thermal camera first when you need to search a broad area, compare rooms, trace an intermittent pattern, or inspect other issues such as insulation and HVAC distribution. The camera becomes easier to justify when it will serve several jobs beyond moisture investigation.
For occasional household troubleshooting, borrowing or renting a thermal camera and owning a modest moisture meter may be the better use of money. Our water-leak thermal-camera guide explains which camera format suits that workflow.
How to use both tools together
- Record the circumstances. Note recent rain, plumbing use, HVAC operation, sunlight, visible staining, odor, and water-meter behavior.
- Scan a broad area. Compare the suspect surface with similar construction nearby. Do not rely on palette color alone.
- Mark the pattern. Save a context image and identify the boundary, not merely the most dramatic pixel.
- Take moisture readings. Test several points inside, outside, and beyond the anomaly. Include a comparable dry reference area.
- Repeat if needed. A pattern that changes after rain or fixture use can help narrow the investigation.
- Find the source. Use plumbing, roofing, drainage, or building-envelope expertise rather than assuming the anomaly points directly to the origin.
The two tools can also disagree. A thermal anomaly without an elevated moisture reading may be caused by insulation or airflow, or the material may be outside the meter’s effective depth. An elevated reading without a visible thermal pattern may mean there is too little temperature contrast. Investigate the disagreement instead of forcing both tools to support the same conclusion.
Pin or pinless: which moisture meter makes sense?
Use a pinless meter to scan finished surfaces with minimal damage and map relative changes. It is especially useful when you need several readings across a wall or floor. Verify the sensing depth and check for metal that could produce a false high response.
Our wood-moisture-meter guide compares a pin meter, a general-purpose pinless scanner, and a species-aware woodworking meter across these workflows.
Use a pin meter when you need a point measurement, can access the material, and small punctures are acceptable. Insulated probes can help assess moisture at a chosen depth on suitable materials, while ordinary short pins emphasize the near-surface region.
Professionals often use both: pinless for fast coverage and pins for targeted confirmation. The meter’s manual and material calibration matter more than a generic “wet” threshold copied from another building material.
Common mistakes to avoid
- Treating blue or purple in a thermal palette as proof of water
- Reporting an apparent temperature to excessive precision on reflective material
- Calling a pinless relative reading a percentage when the meter does not define it that way
- Comparing different materials as if they share the same baseline
- Testing only the center of a stain instead of mapping its edge and a dry reference
- Assuming the visible pattern sits directly below the leak source
If the area involves energized wiring, a sagging ceiling, contaminated water, extensive mold, or structural movement, stop testing and get the appropriate professional help. Tools can narrow the question; they do not make an unsafe area safe.
Diagnostic tools do not stop the source. For preventive systems that can close the main supply after a detected event, see our automatic water-shutoff guide.
If moisture is only one part of a broader property survey, our home-inspection thermal-camera guide explains how the same camera can help investigate insulation, drafts, HVAC distribution, and electrical patterns.
Models discussed
Use these as starting points for checking fit. We do not publish a price or claim hands-on testing.
Product reference
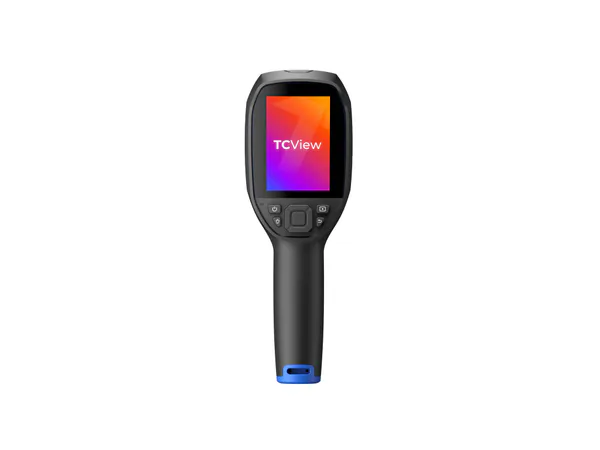
TOPDON TC004 3.5-inch Thermal Imaging Camera
Best for: Repeated room-by-room inspection
Trade-off: A separate device to carry and charge
How this guide was researched
We compare documented product features against the job each buyer needs done. We have not physically tested these products. Check current specifications and availability with the manufacturer or merchant.
Affiliate disclosure: If you buy through a qualifying link, we may earn a commission at no extra cost to you.