
Hidden-space inspection • explainer
How to Use a Borescope for Engines, Pipes, and Walls
Learn how to use a borescope safely, get a clear image, avoid cable and probe damage, and inspect engines, plumbing, and wall cavities.
A borescope is useful when the question is “What is inside that space?” It is much less useful when the operator pushes an unsuitable probe into an unknown route, floods a reflective surface with light, or treats an ambiguous image as a diagnosis.
The basic method is straightforward: make the inspection area safe, confirm that the camera physically fits, test its focus and orientation outside the cavity, advance without force, capture both context and detail, and withdraw the probe along the same controlled route. The preparation matters more than the advertised resolution.
This guide explains how to use a borescope for automotive, plumbing, and wall inspections without pretending that one camera can do every job. Focused Gadgets has not physically tested the three models discussed below. The operating advice is based on current manufacturer documentation and the practical limits of each format.
Quick answer: how to use a borescope
- Make the target safe. Shut down moving equipment, remove the key or power source when appropriate, let hot components cool, and do not insert a probe near live electrical parts, flammable gases, or unknown chemicals.
- Measure the complete access route. The camera head, bend section, mirror attachment, and connector all need to fit—not just the cable.
- Check what is actually waterproof. An IP rating may apply only to the probe and camera head, not the display, phone, plug, or charging port.
- Clean and test the lens before insertion. Confirm focus on a known object at roughly the expected working distance.
- Start with moderate light. Too much LED output creates glare on metal, plastic, water, and glossy deposits.
- Advance slowly without force. Keep track of depth, bends, and orientation. Straighten an articulating tip before removal.
- Record context before close-ups. A recognizable landmark makes a defect image useful later.
- Clean, dry, and inspect the probe after use. Stop using it if the sheath, tip, cable, or connector is damaged.
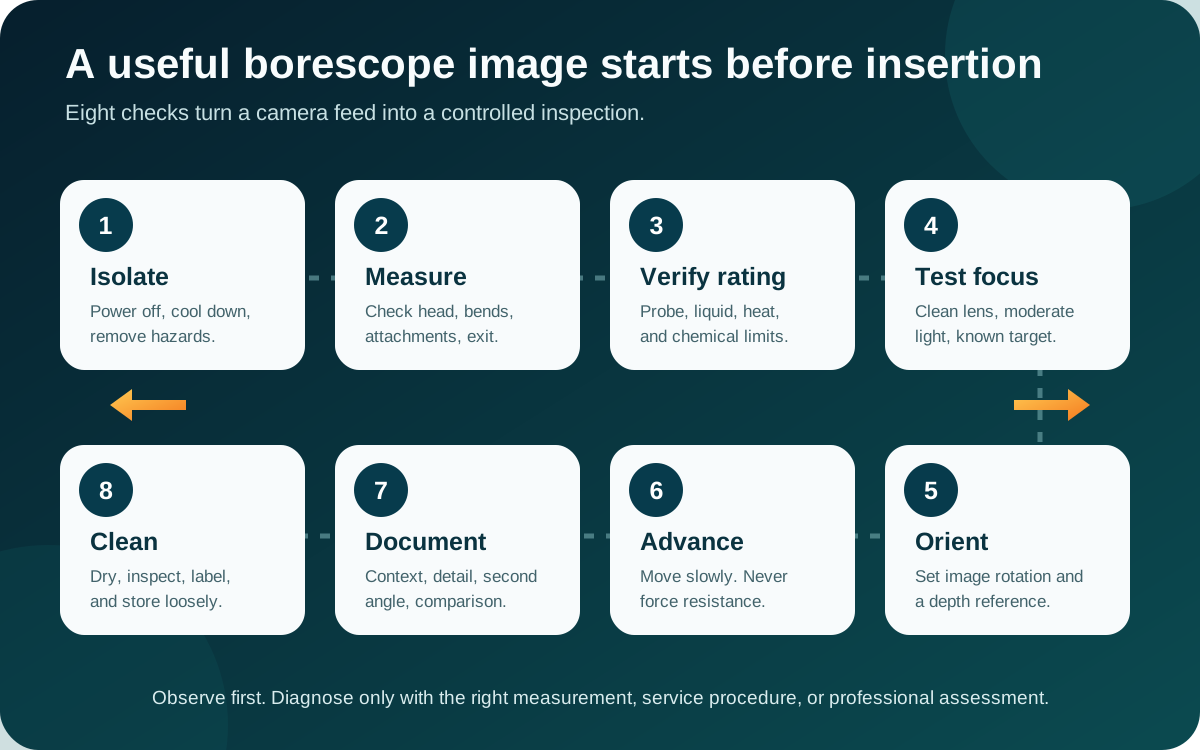
Before inserting the camera: five pass-or-fail checks
Most failed inspections are decided before the lens enters the opening. Work through these checks first.
1. Is the area safe?
Teslong’s inspection-camera safety guidance says not to place a probe near moving parts, live electrical charge, or flammable substances. It also recommends eye and hand protection and warns that drains may contain bacteria, chemicals, and other harmful material.
Turn equipment off and prevent unexpected startup. Let engines, exhaust components, appliances, and hot pipework cool. If you cannot establish whether a wall cavity contains energized wiring, a pipe contains a hazardous substance, or machinery can move, stop and use a qualified professional.
A camera does not make an unsafe opening safe. It only changes what you can see after a safe access method has been established.
2. Will the entire probe path fit?
Compare the smallest opening and tightest bend with the camera-head diameter, not the cable diameter. Attachments such as hooks and mirrors increase the outside dimension and introduce edges that can snag.
An articulating camera also needs room for its bending section to steer. A long semi-rigid cable can reach farther in an open duct or straight cavity but becomes difficult to control after several bends. Cable length is not the same as navigable reach.
Plan the exit before entry. If the path narrows, contains sharp edges, crosses insulation, or disappears behind a trap or baffle, the probe may be easy to insert and difficult to recover.
3. Is the camera designed for the environment?
Read the rating for the exact model and identify which parts it covers. Teslong states that its IP67 probes can tolerate dust and limited immersion while warning against submerging the monitor. A similar split is common among inspection cameras.
“Waterproof probe” does not automatically mean drain-cleaner resistant, fuel safe, oil resistant, suitable for hot components, or approved for pressurized pipework. Do not infer chemical or temperature compatibility from an IP rating.
4. Does the focal range match the target?
Most affordable borescopes use a fixed-focus lens. A high pixel count cannot sharpen a surface held outside that lens’s focal range. Test the camera against a ruler, fastener, printed label, or other known object before insertion. Move it closer and farther away until you understand where the image becomes sharp.
A side-view lens can show a pipe wall or cylinder wall without forcing the tip against it. An articulating front-view lens can aim around a nearby edge. Neither feature removes the need for working distance.
5. Can you retrieve it without pulling hard?
Note how the cable will be routed and where it can snag. Keep unused cable organized outside the opening rather than letting it twist around tools or feet. Never use the probe to push an obstruction or as a retrieval cable.
For an articulating model, return the tip to a straight, neutral position before withdrawal. Teslong explicitly warns against pulling an articulated tip out while bent or forcing the control when resistance is felt.
Set up the camera for a clear image
Clean the lens with the method allowed by the manufacturer. A thin film of oil, dust, or moisture can look like haze, scoring, or a damaged surface. Inspect the probe sheath and camera tip for cuts, crushed areas, loose parts, or exposed conductors.
Charge the display or phone before the job. For a phone-connected endoscope, install the specified app, confirm the connector and operating-system support, and test live video before opening a wall or removing an engine component. A USB-C plug does not guarantee that a particular phone supports the required video or USB accessory mode.
Next, establish orientation:
- Place the camera on a table with a recognizable object at the top of the frame.
- Rotate the probe and watch how the image moves.
- If the app or monitor can rotate or lock the display, set it before insertion.
- Use a piece of removable tape near the cable entrance as an orientation and approximate-depth reference.
Begin with the LEDs at a middle setting. Increase light only until the target becomes readable. Bright polished metal, standing water, and white plastic can bounce light directly into the lens, producing a white ring or hiding surface texture. Pulling back slightly or lowering the LEDs often reveals more than increasing brightness.
Advance the probe without losing control
Feed the cable with one hand near the opening while the other hand controls slack. Small movements are easier to interpret than a continuous push. Pause whenever the image changes abruptly; that may indicate a bend, obstruction, liquid, or the lens touching a surface.
Do not force the head past resistance. Withdraw a little, restore orientation, and decide whether the route is genuinely open. A semi-rigid cable can transmit considerable pushing force to a delicate connector while giving the impression that only the tip is moving.
With an articulating probe, steer only when the head has room to move. Resistance at the control can mean that the tip is pressed against the cavity. Forcing the joystick or wheel risks damaging the articulation wires, the camera, or the inspected object.
Capture images in a sequence:
- A wide contextual view showing a landmark.
- A medium view showing the feature’s location relative to that landmark.
- A close view at the lens’s sharp working distance.
- A second angle or side-lens view when available.
- A comparison image from an equivalent normal area.
Name files by location and sequence as soon as possible. “Cylinder-2-intake-side-01” is more useful than a folder of nearly identical timestamps.
How to interpret a borescope image
A borescope shows appearance, not cause. It can reveal a wet area, deposit, scratch-like line, displaced insulation, debris, corrosion-like discoloration, or obstruction. It generally cannot establish the material, depth, severity, leakage rate, electrical state, structural capacity, or repair method from one image.
Before drawing a conclusion, ask:
- Is the lens clean and within its focal range?
- Could glare, shadow, digital sharpening, or compression create this edge?
- Did the camera touch the surface and move contamination across it?
- Does the feature remain visible from another angle and light level?
- Is there a normal comparison area?
- Can another instrument test the suspected condition?
For example, an inspection camera can locate staining inside a wall, but a moisture meter is better suited to checking whether accessible material is currently wet. A borescope can show a mark on a cylinder wall, but service measurements and professional interpretation are needed before calling it damage.
Using a borescope for automotive inspection
Automotive inspection favors a short, controllable probe when the target is nearby. The engine must be off, secured against starting, and cool enough for the camera’s documented operating range. Never rotate or crank an engine while the probe is inside.
If access requires removing a spark plug, injector, intake component, or trim, follow the service information for the exact vehicle. The camera guide does not replace torque specifications, contamination control, battery-disconnection procedures, or component-specific safety steps.
Once safe access exists:
- Confirm that the camera head passes through the full opening without scraping.
- Inspect the entrance first so debris is not mistaken for an internal defect.
- Use the same camera orientation, light level, and inspection sequence for each cylinder or repeated component.
- Capture landmarks before close-ups.
- Withdraw and clean the lens if the image suddenly becomes uniformly hazy.
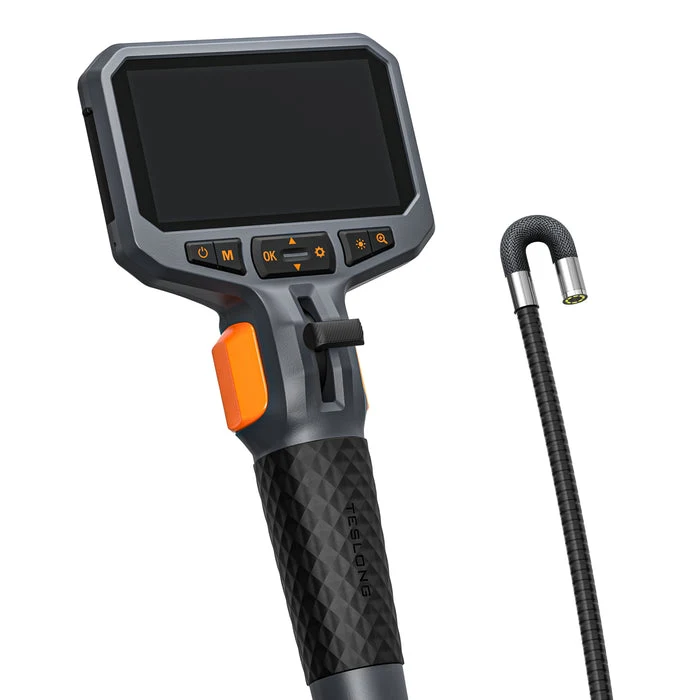
An articulating model such as the Teslong TD450S is the most controlled format among the three products discussed here for short access and aiming after insertion. Its dedicated screen avoids phone compatibility, but its 8.5 mm head still has to fit the complete route. Our best borescope guide explains the fit trade-offs in more detail.
Using a borescope for plumbing and drains
A general-purpose borescope is not automatically a sewer camera. Dedicated drain systems use a pushrod, retrieval design, camera head, sealing, and sometimes a locator built for pipe travel. A thin semi-rigid phone cable can fold, snag at a trap, or become difficult to recover from a long dirty route.
Limit a general-purpose camera to a known, accessible section that falls within its documented water and chemical limits. Do not insert it into a drain containing an unidentified cleaner or combine the inspection with chemical treatment. Wear suitable eye and hand protection, keep the phone or display away from contamination, and wash exposed skin after the job.
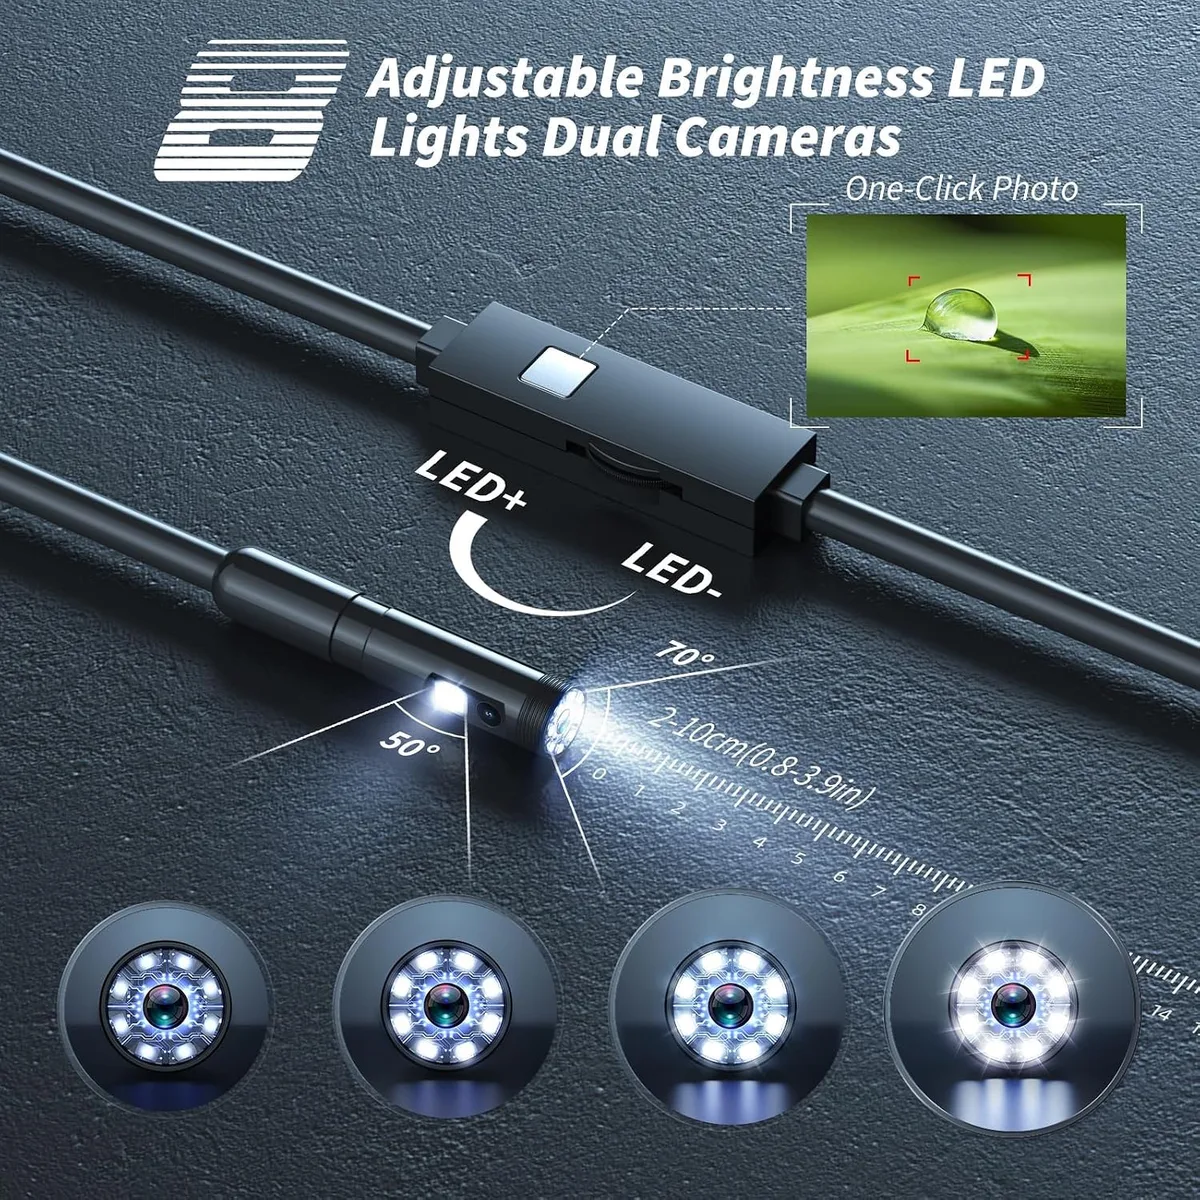
A long-reach model such as the Kinpthy W400-B25 can suit a relatively open route when its phone, app, connector, probe diameter, and water rating have all been confirmed. Its long semi-rigid cable is reach, not steering. Stop if it will not follow the route with light guidance.
After withdrawal, keep the contaminated probe away from the display and connector. Clean it only with products allowed by the manufacturer, let it dry fully, and inspect the sheath before storage.
Using an inspection camera inside a wall
A borescope does not see through drywall. It sees inside a cavity after the camera enters through an existing or deliberately created opening. Use an existing outlet opening, access panel, fixture hole, or other safe route when appropriate and permitted rather than drilling blindly.
Before creating any opening, review available plans and establish the possible location of wiring, plumbing, gas lines, ducts, framing, and barriers. Switching off one circuit does not prove that every cable in a cavity is de-energized. If the route is uncertain, use a qualified tradesperson and appropriate locating equipment.
Once access is safe, keep the head close enough for focus but away from loose insulation and wiring. Rotate slowly so the image retains a usable sense of direction. Record the entry point, approximate depth, and direction alongside each image.
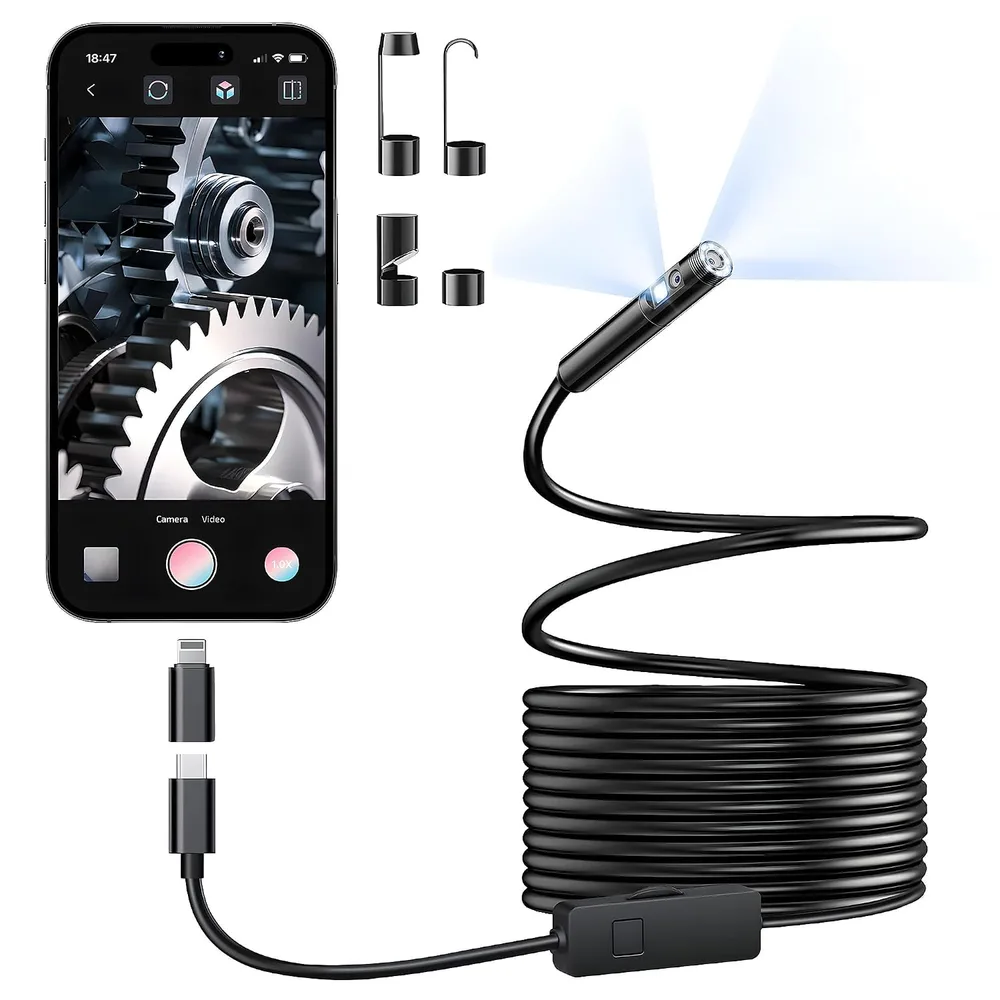
The Elecshion C-E64 is the budget-oriented option here for an occasional inspection through a known wall, cabinet, duct, or appliance route. It provides front and side views, but it remains dependent on app and connector compatibility and has a long cable that cannot be actively steered. See our Elecshion C-E64 review before relying on it for a specific phone.
Common borescope mistakes
Using maximum light all the time
More light can erase detail through glare. Start in the middle and adjust for the surface.
Holding the lens too close
A blurred image is often a working-distance problem, not a resolution problem. Back away until edges become defined.
Pushing a long cable from the handle
Control the cable near the entry point. Pushing from far away creates loops and transfers force poorly.
Treating dual lenses as articulation
A side lens changes viewing direction; it does not steer the head. Our articulating versus dual-lens comparison explains which format fits each route.
Ignoring app compatibility until the job starts
Install, connect, record, and export a test image first. Check whether the app remains available for the phone’s current operating system.
Diagnosing from one ambiguous image
Change distance, brightness, orientation, and viewing angle. Compare with a known normal area and use the proper measurement or service procedure to confirm the finding.
Forgetting the removal path
Do not advance beyond a bend or obstruction unless the cable can return without force. Straighten an articulating tip before withdrawal.
Which borescope format fits the job?
| Inspection need | Better starting format | Why | Main caution |
|---|---|---|---|
| Short automotive or accessible wall target | Articulating probe with dedicated screen | Aims after insertion and avoids phone setup | Head and bending section need clearance |
| Long, relatively open duct or cavity | Semi-rigid phone borescope | More reach at lower cost | Cable length does not provide steering |
| Need to see forward and sideways | Dual-lens camera | Changes viewing direction without an attachment | Side view is not articulation |
| Long drain or sewer line | Purpose-built pipe camera | Pushrod and retrieval system are designed for pipe travel | General-purpose phone cables are poor substitutes |
| Energized, moving, hazardous, or medically invasive target | Do not use a consumer borescope | The environment exceeds the tool’s safe role | Use qualified personnel and approved equipment |
The phone borescope comparison covers the two long-reach app-dependent options. Buyers choosing among all three formats should start with the access route in our inspection-camera guide, not the highest resolution claim.
After the inspection
Power the device off before cleaning. Teslong recommends a soft microfiber cloth and cotton swab for the lens, with warm water or rubbing alcohol for stubborn residue, while warning against stronger solvents and moisture in openings or ports. Follow the instructions for the exact model and contaminant rather than applying one cleaning method universally.
Let the probe dry fully before coiling it. Use a relaxed coil at least as large as the original packaging; tight loops can damage conductors or the semi-rigid structure. Store an articulating tip straight and neutral. Keep the device away from sharp tools, heavy objects, temperature extremes, and damp storage.
Review the images while the route is still fresh in memory. Add location notes, discard unusable frames, and identify what needs confirmation. The useful outcome may be “call a mechanic,” “measure moisture,” “use a proper drain camera,” or “open the wall at a known safe point”—not a confident diagnosis from the screen alone.
Frequently asked questions
Can a borescope see through walls?
No. It can see inside a wall cavity only after the camera enters through an opening. It cannot make wiring, pipes, or framing visible through intact drywall.
Can I use a borescope in an engine cylinder?
Yes, when the exact camera fits and the engine is off, secured against starting, cool, and accessed according to the vehicle’s service procedure. Never crank or rotate the engine with the probe inside.
Can I put a waterproof borescope down a drain?
Only within the exact probe’s immersion, temperature, and chemical limits and only where it can be retrieved safely. A waterproof camera head does not make the display, phone, connector, or cable suitable for every drain.
Why is my borescope image blurry?
The lens may be dirty, too close to the target, outside its focal range, covered by moisture, or overwhelmed by glare. Clean it, reduce the LEDs, and change the working distance before blaming resolution.
What is the difference between a borescope and an endoscope camera?
Consumer listings often use the terms interchangeably. For this guide, both mean a non-medical remote inspection camera. Never use a consumer inspection camera on a person or animal.
Is an articulating borescope better than a dual-lens camera?
It is better when the operator must aim the head after insertion. A dual-lens camera is often simpler and less expensive when the route is known and changing between forward and side views is enough.
Final checklist
Before the lens enters the opening, confirm:
- The equipment is off, cool, and unable to start unexpectedly.
- The area is free of live electrical exposure, moving parts, flammable gas, and unknown chemicals.
- The complete camera head and bend section fit the route.
- The probe—not merely the product name—has the required environmental rating.
- The lens is clean, focused, oriented, and set to moderate brightness.
- The phone, app, connector, recording, and export functions work.
- The route and retrieval plan are understood.
During the inspection, advance without force and capture context before detail. Afterward, clean and dry the probe, inspect it for damage, label the images, and confirm any suspected defect with the appropriate measurement or professional assessment.
Models discussed
Use these as starting points for checking fit. We do not publish a price or claim hands-on testing.
| Model | Format | Best fit | Trade-off |
|---|---|---|---|
| Teslong TD450S Single-Lens Articulating Borescope | 5-foot two-way articulating inspection camera | Short automotive and accessible wall-cavity inspections | 8.5 mm head and five-foot reach; the integrated articulated probe is not replaceable |
| Kinpthy W400-B25 Dual-Lens Phone Endoscope | 16.4-foot dual-lens phone endoscope | Long-reach inspections when phone and app compatibility are confirmed | App-dependent viewing and a long semi-rigid cable that cannot be actively steered |
| Elecshion C-E64 Dual-Lens Phone Endoscope | 16.5-foot dual-lens phone endoscope | Occasional wall, cabinet, duct, and appliance inspections through a known route | App and connector compatibility must be verified; no independent screen or complete manufacturer support library |
Product reference
Teslong TD450S Single-Lens Articulating Borescope
Best for: Short automotive and accessible wall-cavity inspections
Trade-off: 8.5 mm head and five-foot reach; the integrated articulated probe is not replaceable
Product reference
Kinpthy W400-B25 Dual-Lens Phone Endoscope
Best for: Long-reach inspections when phone and app compatibility are confirmed
Trade-off: App-dependent viewing and a long semi-rigid cable that cannot be actively steered
Product reference
Elecshion C-E64 Dual-Lens Phone Endoscope
Best for: Occasional wall, cabinet, duct, and appliance inspections through a known route
Trade-off: App and connector compatibility must be verified; no independent screen or complete manufacturer support library
How this guide was researched
We compare documented product features against the job each buyer needs done. We have not physically tested these products. Check current specifications and availability with the manufacturer or merchant.
Affiliate disclosure: If you buy through a qualifying link, we may earn a commission at no extra cost to you.